
3 Common Mistakes Made When Installing Poly Sand
Polymeric sand is a powerful product in hardscape installations—offering durability, joint stability, and a clean finish. But like many construction materials, it only performs as well as it's installed. In this post, we’ll share the three most common mistakes we see in polymeric sand installations—and what you can do to avoid them.
1.) Improper Compaction
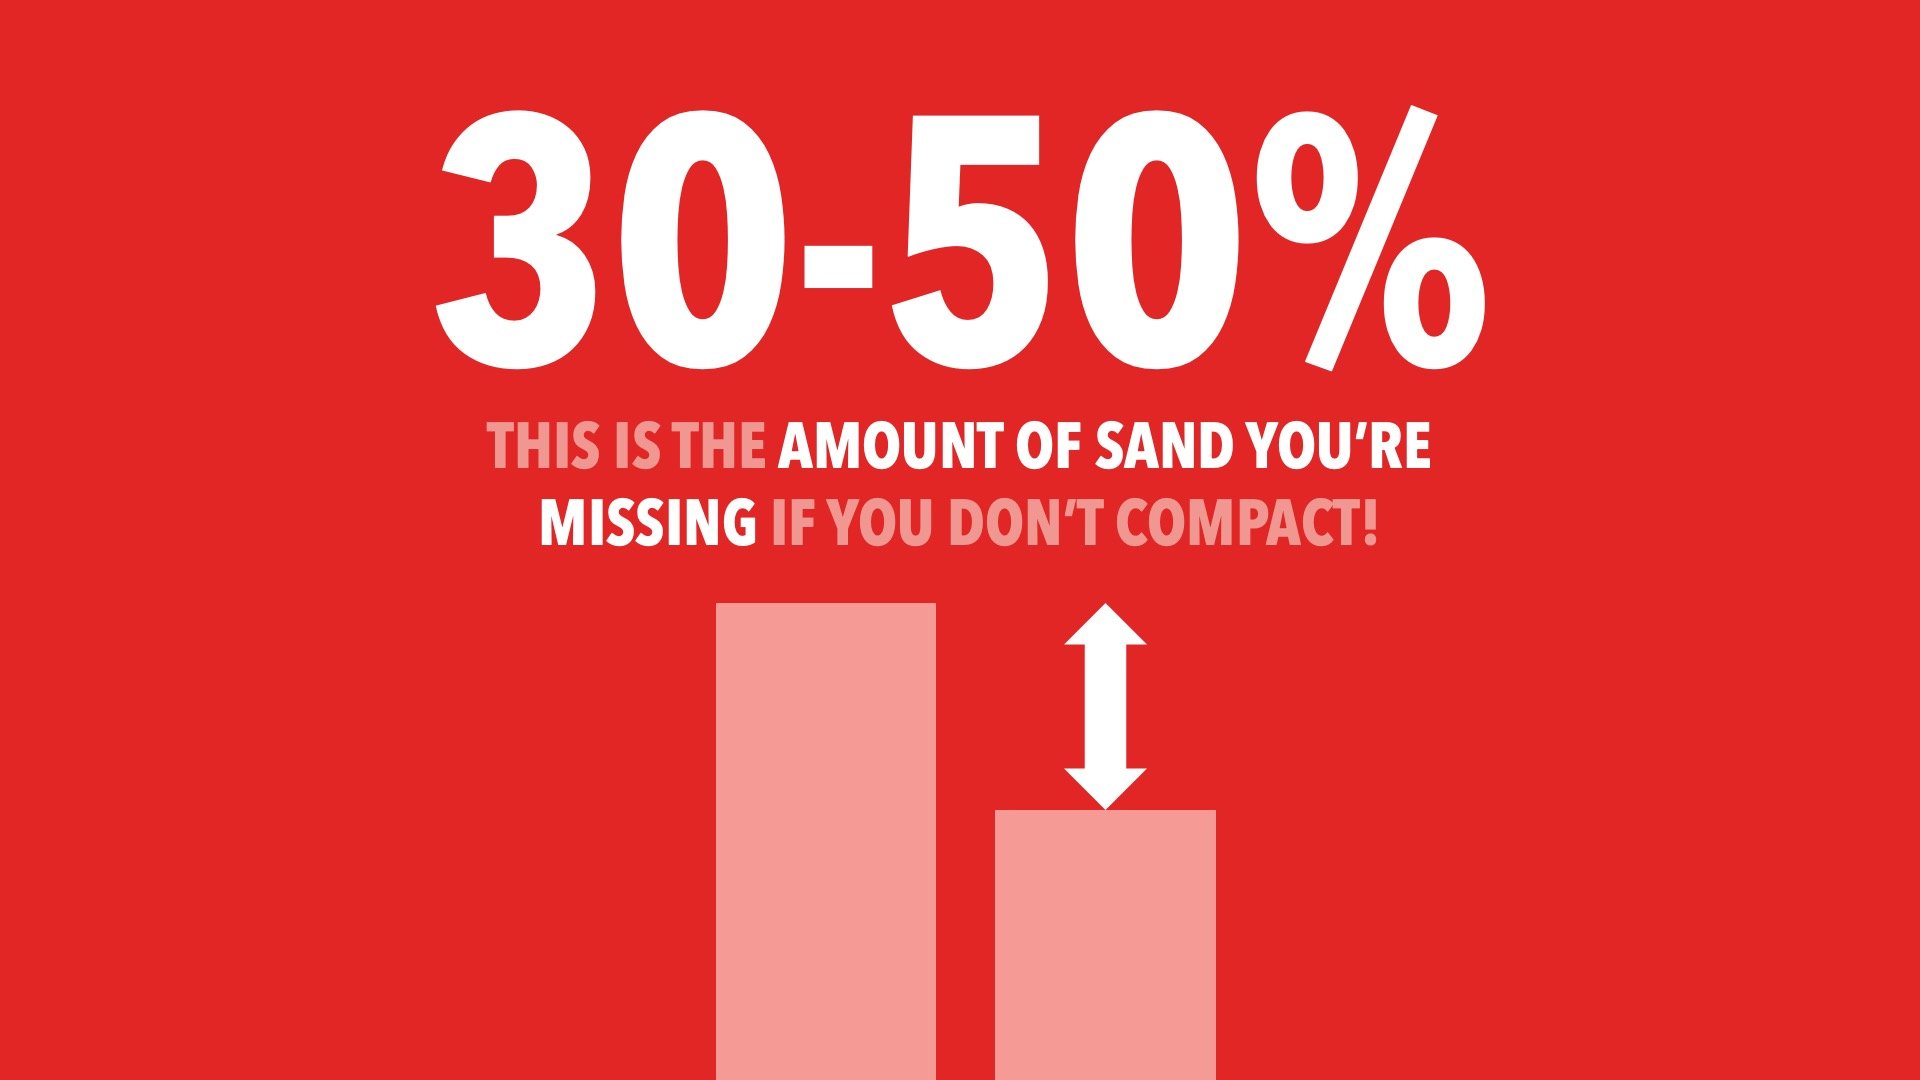
Under compacting or—worse, skipping compaction all-together—is a frequent and damaging mistake we see in polymeric sand installations. The purpose of compaction is to force the sand particles down into the joints, reducing void space between particles. Less void space means stronger joints—and a better seal against water infiltration into the base.
Here’s a surprising fact: after the first round of compaction, polymeric sand can drop as much as 50% in the joint. That’s right—if you skip this step, you could be missing half of the sand you thought you installed. Less sand means fewer binding polymers—and a much weaker joint.
Every joint should be compacted, even with large format pavers. A plate compactor or roller compactor is ideal, but even hand tamping is better than no compaction at all.
2.) Improper Joint Height
Aesthetically-speaking, overfilled joints take away the beautiful three-dimensional look of a paved surface. More importantly, however, they’re a recipe for failure. When polymeric sand is packed too high in the joint, it can swell when wet, pushing up above the surface of the paver. This makes the joint material more vulnerable to foot traffic, tires, snow removal equipment, etc. The pavers are meant to endure surface traffic—not the joints.
Another common issue with overfilled joints? Peeling. As the sand tries to expand past the edge of the paver, it can flake off or dislodge entirely.
The fix? Aim for ⅛" below the chamfer or edge of the paver. This gives the sand room to expand without protruding above the surface. For pavers with an irregular surface, be sure to keep the sand ⅛” below the lowest part.

3.) Improper Watering
Watering is the final, and one of the most critical, steps in a polymeric sand installation. In the past, “misting” was the recommended approach—but with today’s advanced products like Alliance G2 Polymeric Sand, that method just doesn’t cut it. So change your vocabulary, and your hose nozzle, to Shower!
Here’s why: Light watering may only activate the top layer of sand, creating a hardened crust while leaving everything underneath dry and inactive, just as it came out of the bag. That’s a failure waiting to happen.
G2 requires a deep, thorough soak—and fast. We recommend:
Working in 30 square foot sections
Watering for at least 30 seconds per section (or more for wider joints)
Continuing until the joints refuse any more water
Pro Tip: On hot, dry days, work quickly. You want all the water to enter the joint in a single shot and fully activate before it evaporates.
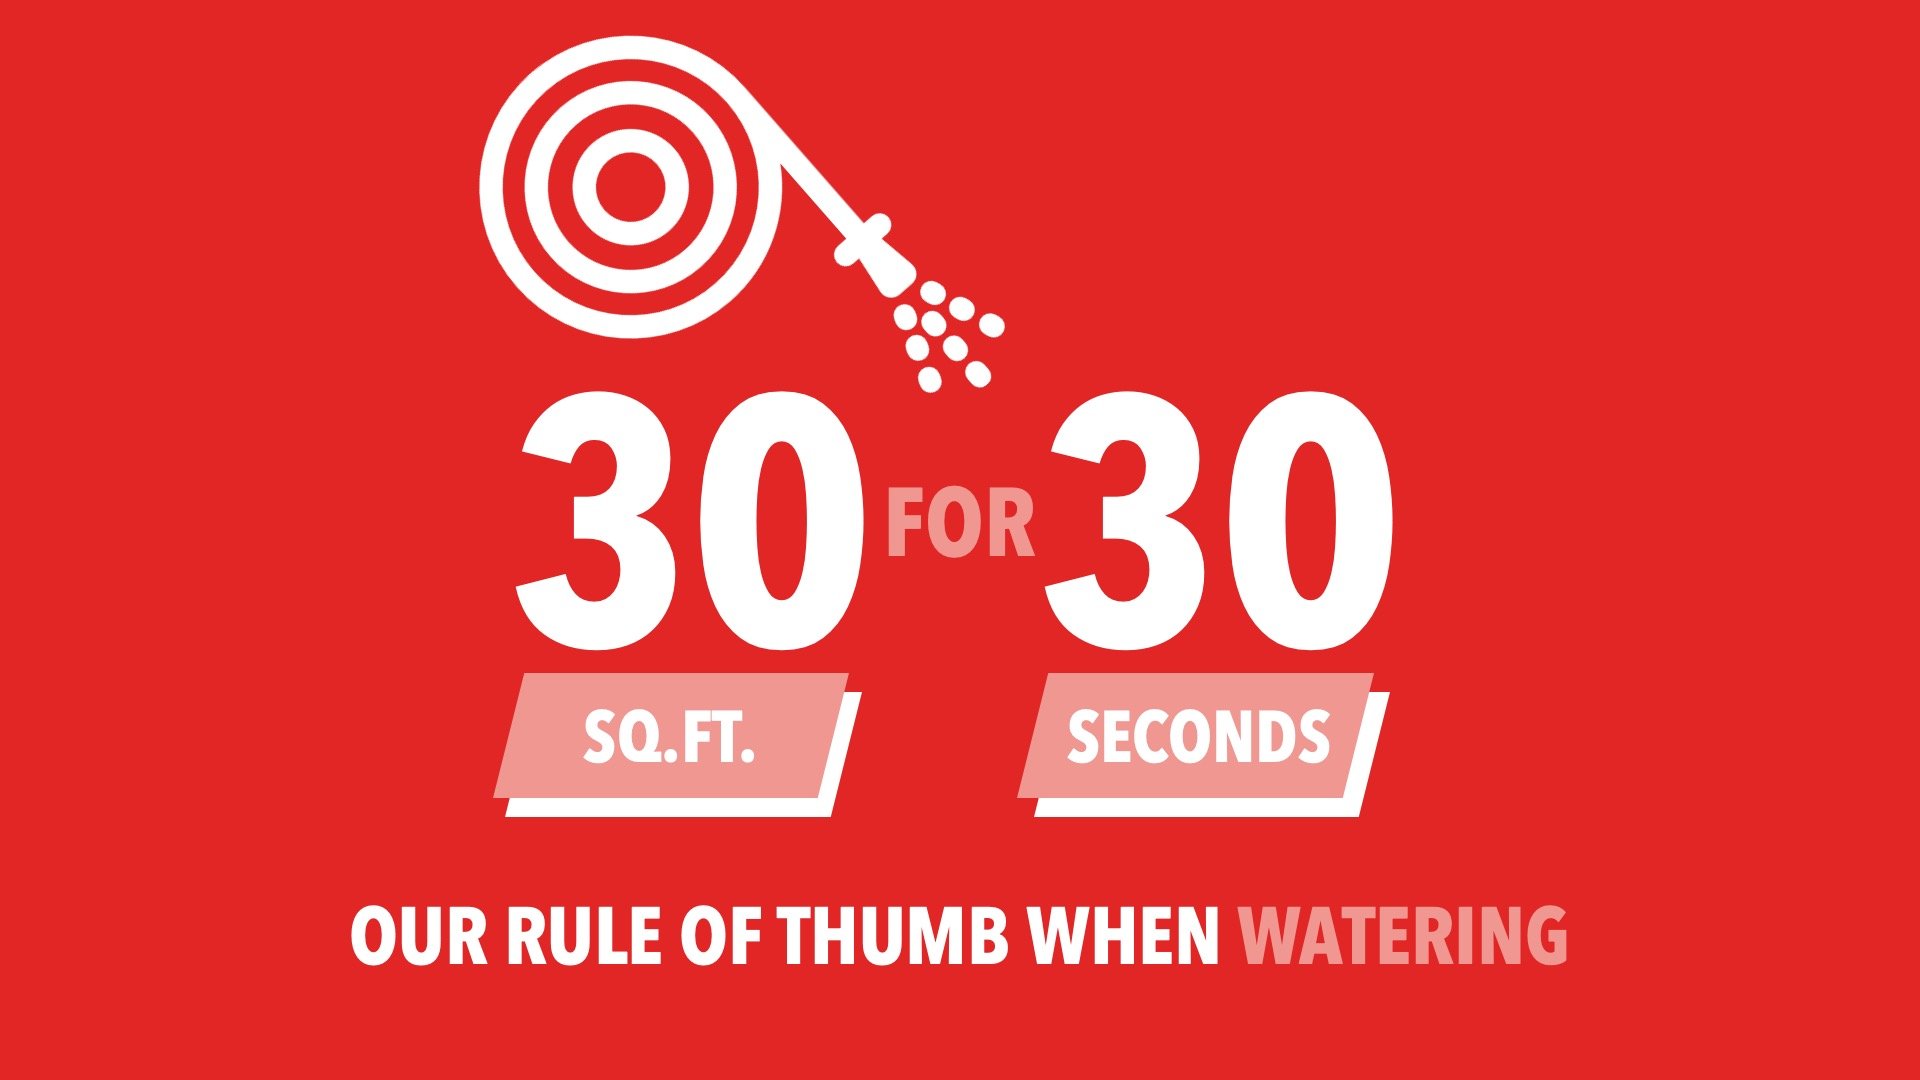
Remember: 30 for 30 when working with G2!
Final Thoughts
Polymeric sand offers long-term performance and curb appeal—if it’s installed correctly. Focus on proper compaction, mindful joint height, and thorough watering, and you’ll set yourself (and your project) up for success.
Want more poly sand pro tips? Take our free training course: Polymeric Sand For Dummies.
