How To Create The Perfect Artificial Turf Seam
When installing artificial turf, your seam is where craftsmanship shows. A flawless seam should be virtually invisible, structurally sound, and built to perform long-term. Achieving that finish comes down to precision cutting, proper alignment, and using the right products — especially Gator XP Glue.
Here’s our proven step-by-step method for creating a clean, professional turf seam.
Step 1: Trim from the back side of the turf and cut close to the stitch line
Flip the turf over and trim from the backside, cutting close to the stitch line without damaging it. Use the stitch line as your cutting guide – clean trimming ensures the seam will lay tight and consistent.

Step 2: Trim the second piece, cutting far from the stitch line
When seaming, one side of the seam should be close to the stitch gauge, and the adjacent side should be further away in order to keep the consistency of the stitch gauge. When cutting the second piece, trim farther away from the stitch line. This spacing allows the rows to blend naturally once joined together.
Precision trimming on both sides is what allows the pieces to “zipper” together cleanly in the next steps.
Step 3: Place the seam tape
Center the seam tape directly beneath where the two pieces of turf will meet, ensuring it runs the full length of the seam and lies flat against the base. Proper tape placement is critical for strength and long-term durability.

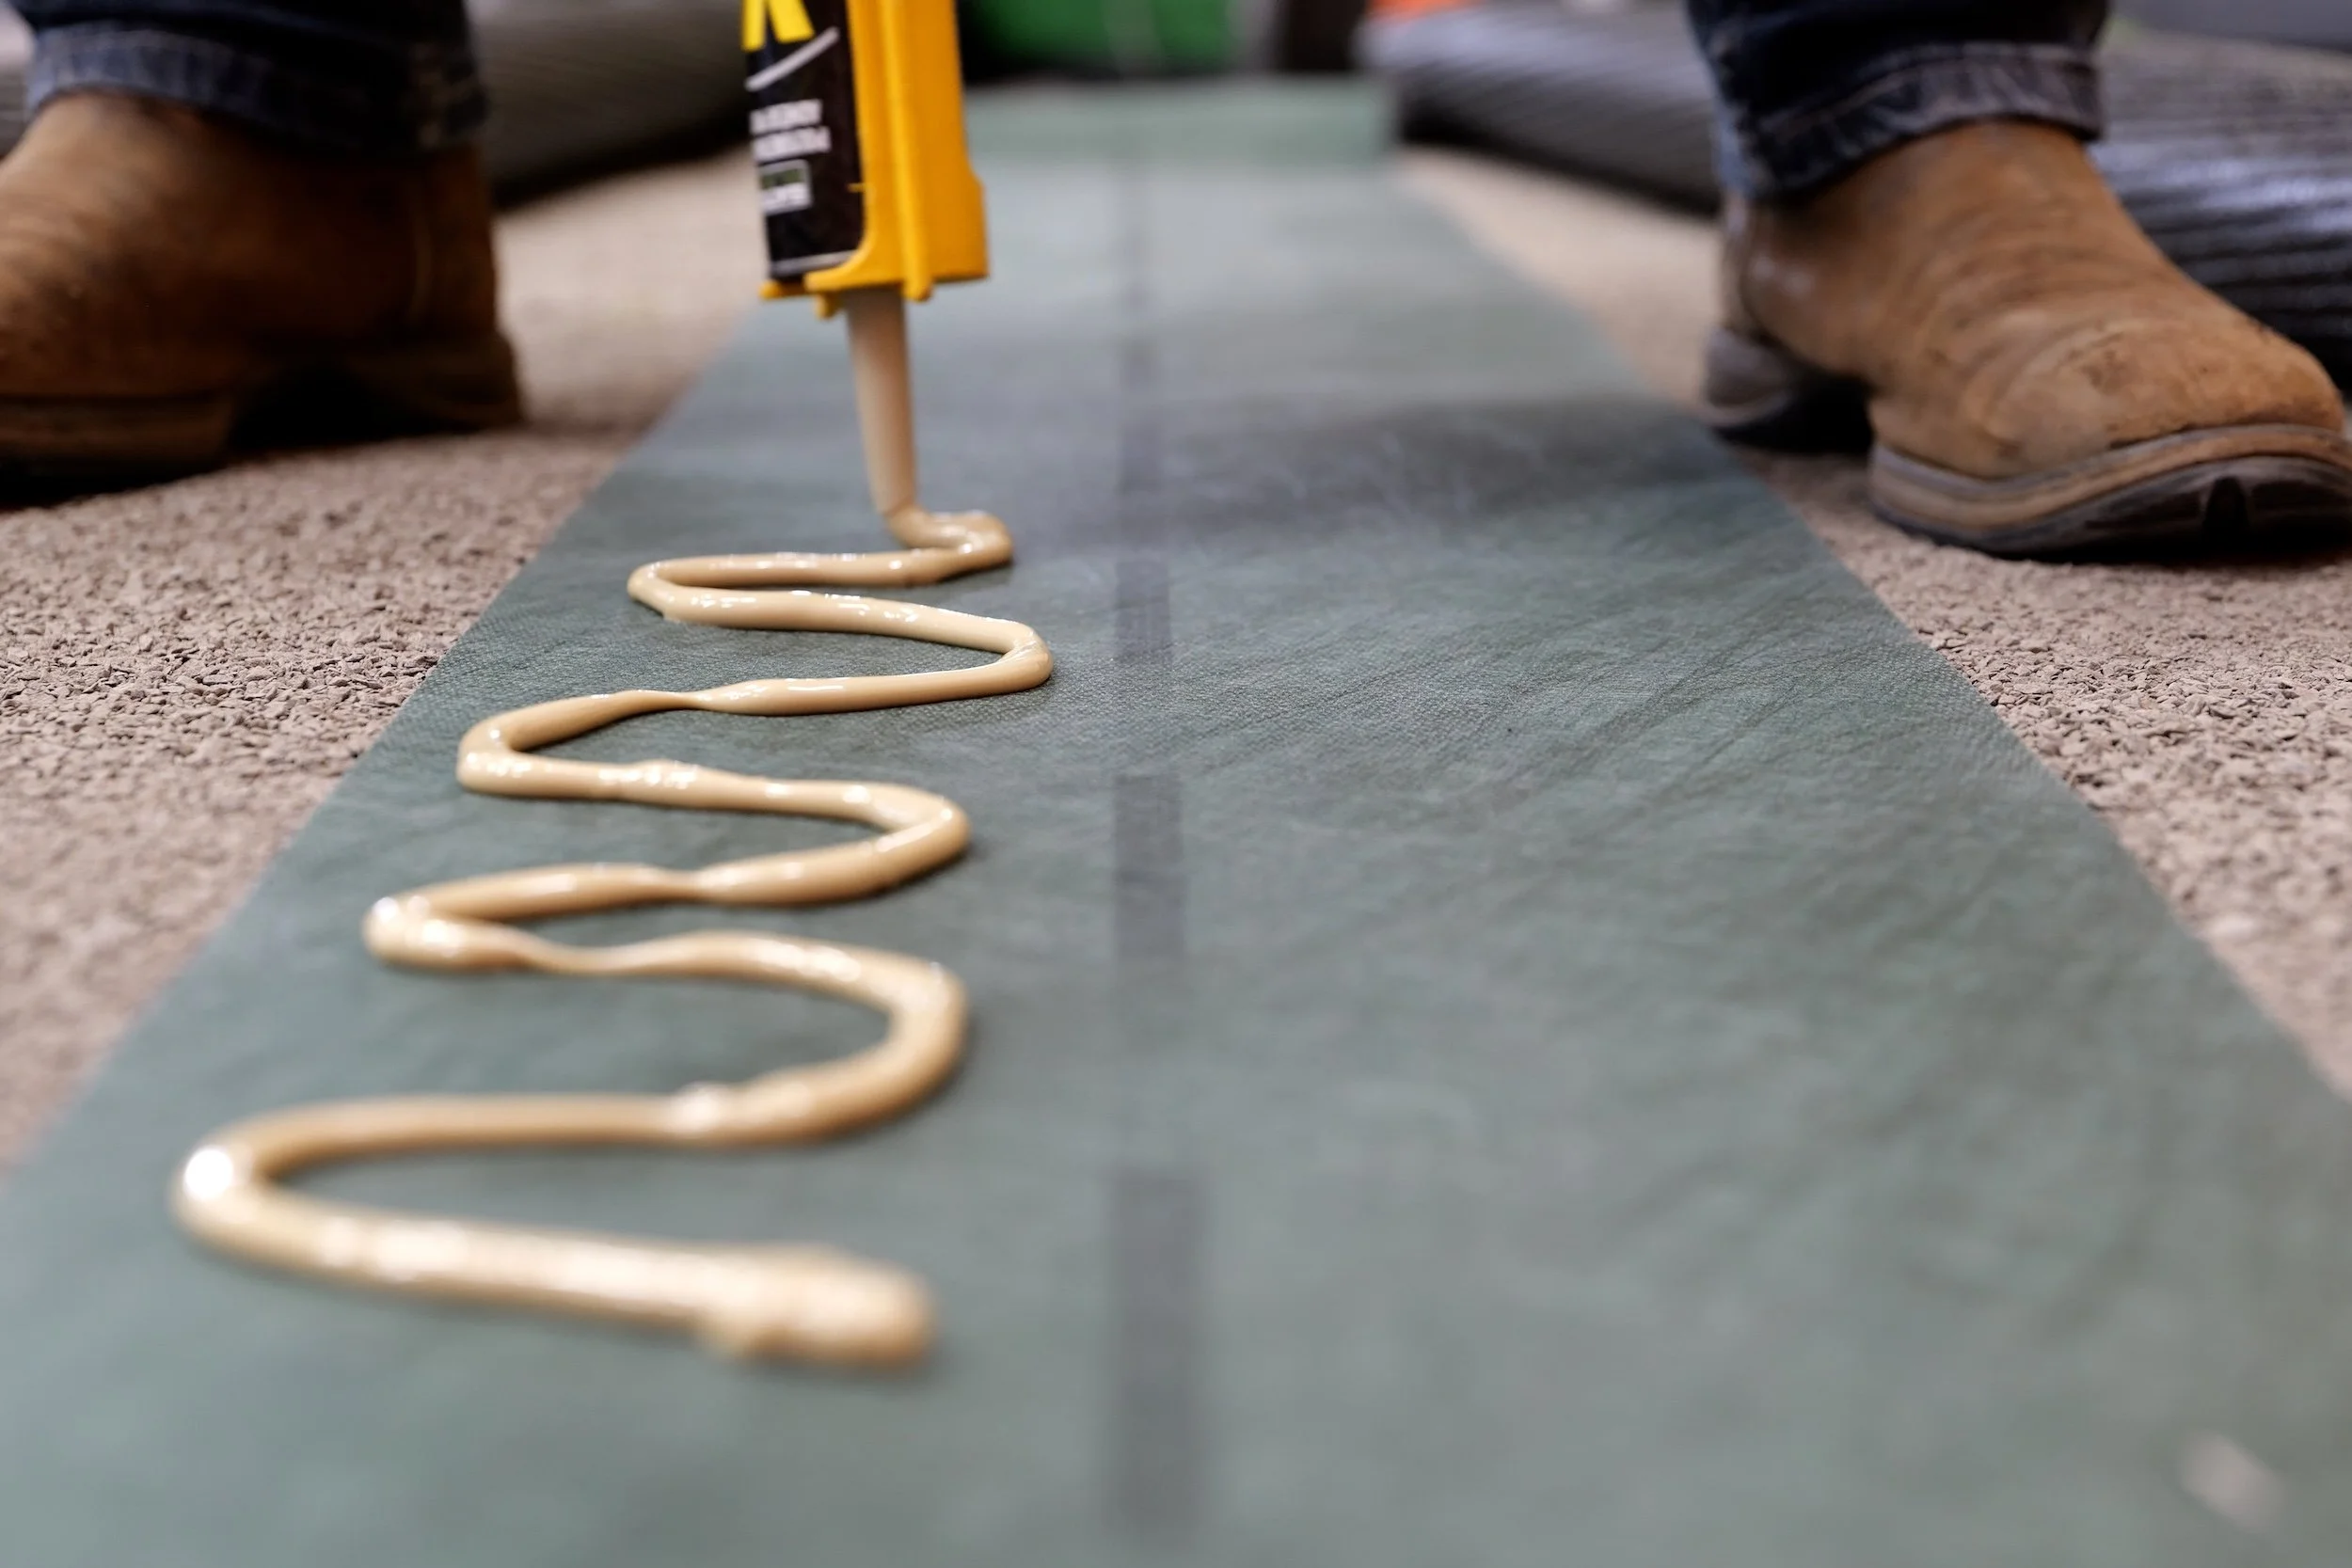
Step 4: Apply glue to the seam tape
We strongly recommend using Gator XP Glue with artificial turf. It’s easy to install and formulated with a thick viscosity that completely fills the peaks and valleys of the stitch gauge. This improves overall bonding to the seam tape and creates a stronger seam.
Apply XP Glue in a squiggle pattern or rows of lines on either side of the center line on the seam tape. It’s very important to avoid getting glue on the center line of the seam tape. If glue seeps through, it can make a mess of the turf blades and impact the final appearance.
Pro Tip: Because Gator XP Glue is a moisture-cure product, you can lightly spritz the seam tape with water to help expedite cure time.
Step 5: Join (or zipper) turf pieces together
Carefully bring the two trimmed edges together over the adhesive. Use a “zipper” method to ensure the pieces of turf blend together naturally without overlapping or leaving gaps.
Take your time here — alignment is everything. A properly “zipped” seam will visually disappear into the surrounding turf.

Step 6: Roll the seams
Once aligned, use a seam roller to firmly press along the entire joint. Rolling ensures full contact between the turf backing and the adhesive, eliminates air pockets, and strengthens the bond.
Step 7: Weigh the surface down and allow the glue to dry
To secure the seam during curing, weigh the turf down evenly. Infill sand bags work perfectly for this. Allow the glue to dry completely — typically around three hours, depending on conditions.
The Gator Xturf Difference
Creating the perfect seam isn’t just about connecting two pieces of turf — it’s about ensuring long-term performance. By combining precise trimming techniques with high-performance products from the Gator Xturf Collection, installers can achieve a seam that is:
Strong
Clean
Long-lasting
Nearly invisible
When done the Gator Xturf way, the final surface looks continuous — not pieced together — delivering the professional results your project demands.